Getting started with wallets
In order to interact with any blockchain, you will need a wallet. Wallets are used to store funds, pay for gas, make transactions and interact with smart contracts.
What is a wallet?
A crypto wallet can be software-based or hardware-based but typically consists of a private key and a public key. The private key is the one that is used to sign transactions and also to recover or move your wallet. This key should be stored in a safe place and never be shared with anyone. The public key, on the other hand, is also known as your public address. This key can be shared with anyone and can be used to receive payments. One way to easily think about the differences is that your public key is like your home address where people can send you mail while your private key are your home keys. Of course, you might want to share your address but not your keys. There are different types of wallets, but for this tutorial, we are just going to focus on Metamask, which is a wallet browser extension that is widely used to interact with dApps. You can download the Metamask browser extension from metamask.io and you are ready to get started.
Create your first wallet
When you open the Metamask extension for the first time, you’ll be asked if you want to recover a wallet or create a new one. In our case, we are just going to create a new wallet and Metamask will prompt us to set a password. The password will be only used to access our wallet. A screen will then appear that outlines what a secret recovery phrase is, how you should copy it down (you should record this on paper and not in digital form), and information on why you should never share your secret recovery phrase with anyone. In short, your secret recovery phrase comprises of 12 random words. It’s there as a backup in case you lose your phone or laptop where your MetaMask wallet is downloaded and you need to import the wallet to a new device. While writing down your secret recovery phrase, you will need to carefully copy down each word in the order they are presented on the screen. The order of the words is crucial as you won’t be able to import your account to a new device if the words are in the wrong order, even if you entered all the right 12 words. MetaMask will then prompt you to type in the 12 word sequence before you can move on to the final steps.
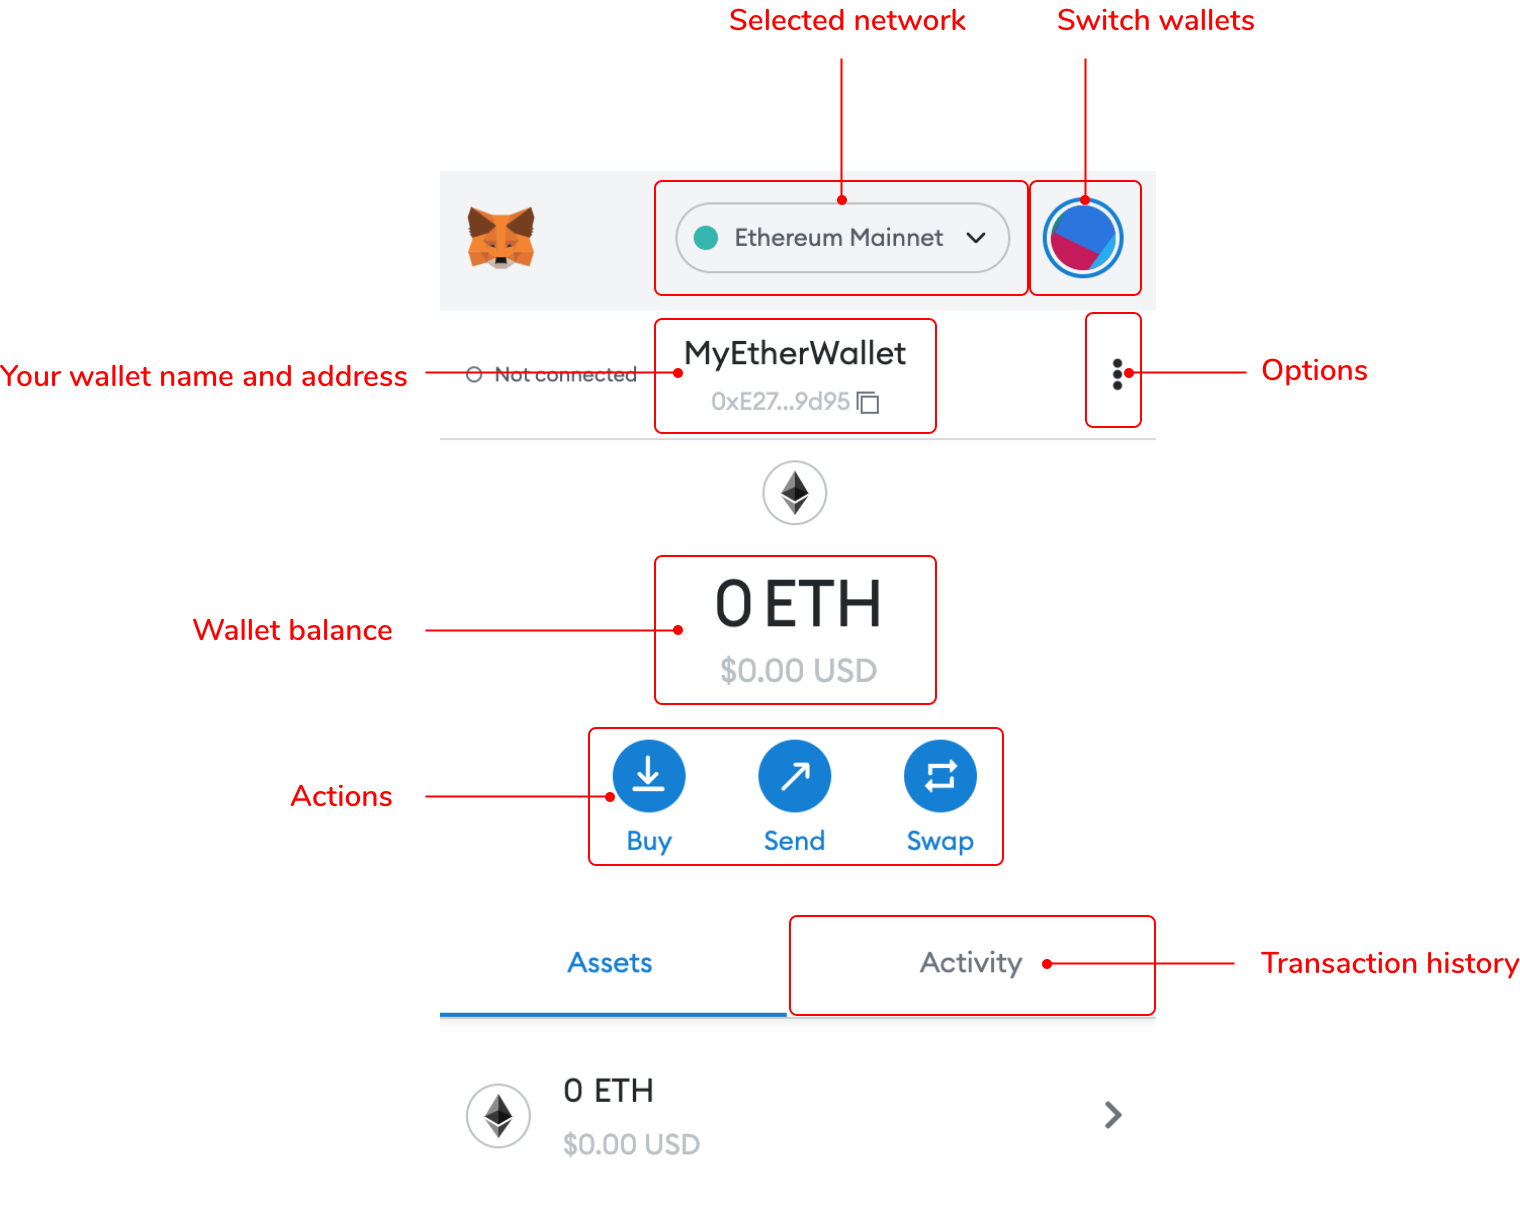
User interface overview
Faucets
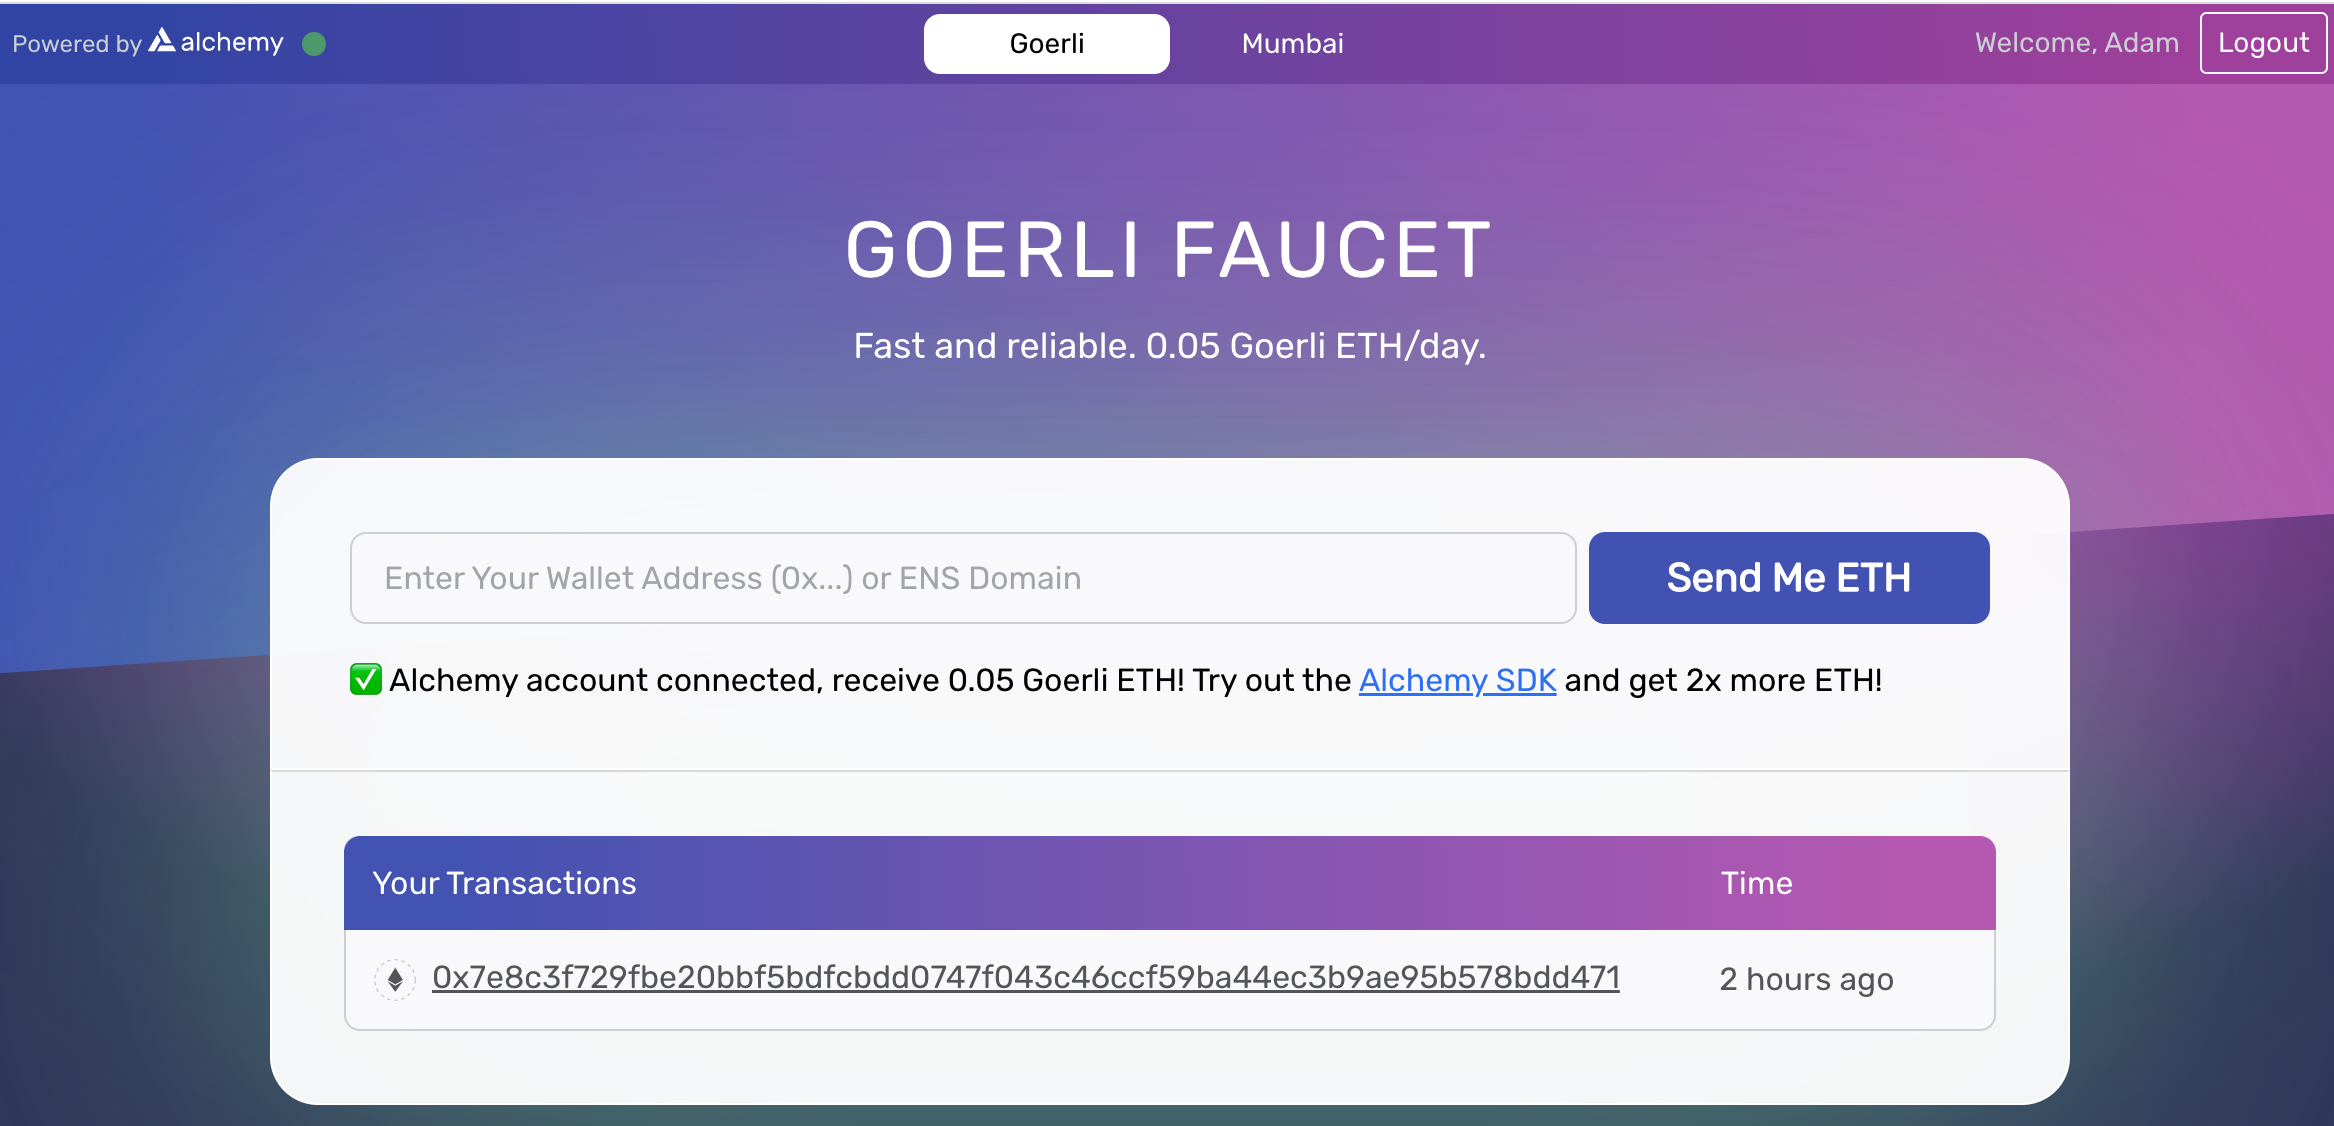
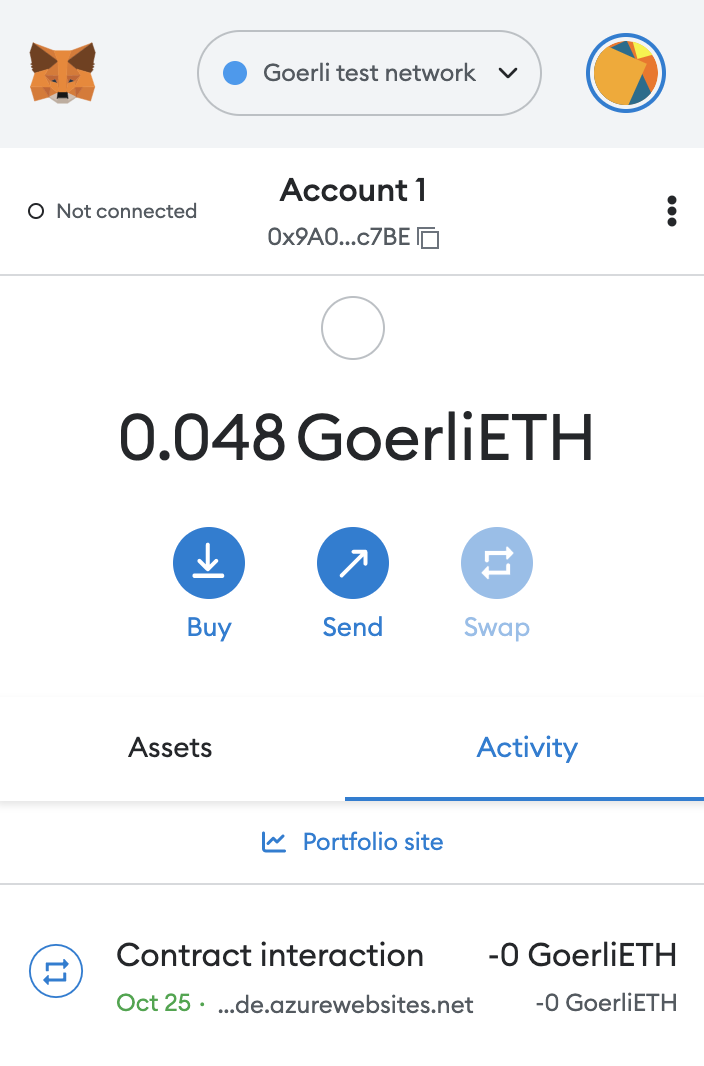
Once you have familiarized yourself with how the Metamask wallet looks like and functions, you should fill it up with some “fake” crypto from a faucet. This will allow you to test the contracts you will build in later lessons on an actual blockchain. We recommend getting money for the Goerli testnet by going to the following faucet here. You will just need to create an Alchemy account and copy and paste your Goerli test network address from your Metamask wallet (found at the top of your wallet after selecting the test network). If you do not see the Goerli test network option on your wallet, please following the following steps. 1. In Metamask click the top dropdown bar to see the list of networks 2. Then right below the title word "Network" you'll see "show/hide test networks" 3. Click that. Then on the screen that opens up for advanced settings 4. Toggle On for "show test networks" 5. Then close the options 6. Now when you go to the Network page you'll see "Goerli Test Network" there as well as some other test networks.
Further readings
If you are looking to learn more about Metamask, we suggest visiting their up to date content and knowledge base here
Get started wityh Loki.code today
Start creating your dApp in seconds.